Hey there! I'm a supplier of L Type Angle Bars, and today I'm gonna walk you through the process of installing these nifty things on a floor. Whether you're a DIY enthusiast looking to spruce up your space or a professional contractor working on a big project, this guide will help you get the job done right.
Why Use L Type Angle Bars?
Before we dive into the installation process, let's quickly talk about why you might want to use L Type Angle Bars in the first place. These bars are super versatile and can be used for a variety of purposes. They're great for providing structural support, protecting edges, and adding a decorative touch to your floors. They come in different materials like stainless steel, aluminum, and carbon steel, so you can choose the one that best suits your needs. For example, if you're looking for something durable and corrosion-resistant, Stainless Steel 304 Angle Bar is a great option.
Tools and Materials You'll Need
To install L Type Angle Bars on a floor, you'll need the following tools and materials:
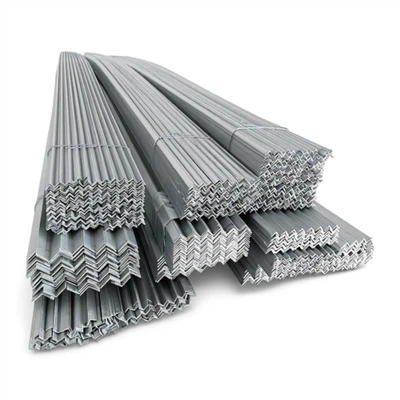
- L Type Angle Bars: Of course, you'll need the bars themselves. Make sure you measure the area where you'll be installing them and get the right length and size. You can check out our L Type Angle Bar options for a wide range of choices.
- Measuring Tape: To measure the length and width of the area and cut the bars to the right size.
- Saw: A hacksaw or a power saw, depending on the material of the angle bars.
- Drill: To make holes for screws or bolts if you're using them to attach the bars.
- Screws or Bolts: To secure the angle bars to the floor.
- Level: To ensure that the bars are installed straight and level.
- Pencil: To mark the spots where you'll be drilling or cutting.
- Safety Gear: Gloves, safety glasses, and a dust mask to protect yourself during the installation process.
Step-by-Step Installation Process
Step 1: Prepare the Floor
The first step is to prepare the floor where you'll be installing the L Type Angle Bars. Clean the floor thoroughly to remove any dirt, dust, or debris. If the floor is uneven, you may need to level it using a self - leveling compound. This will ensure that the angle bars sit flat and secure.
Step 2: Measure and Cut the Angle Bars
Use a measuring tape to measure the length of the area where you want to install the angle bars. Mark the measurement on the bars using a pencil. Then, use a saw to cut the bars to the right length. Make sure to wear safety glasses and gloves when cutting the bars to protect yourself from sharp edges and flying debris.


Step 3: Mark the Installation Points
Place the cut angle bars on the floor where you want to install them. Use a pencil to mark the spots where you'll be drilling holes for the screws or bolts. Make sure the marks are evenly spaced and straight. You can use a level to check the alignment.
Step 4: Drill the Holes
Using a drill, carefully drill holes at the marked spots on the floor and the angle bars. Make sure the holes are the right size for the screws or bolts you'll be using. If you're working on a hard floor like concrete, you may need to use a masonry drill bit.
Step 5: Attach the Angle Bars
Place the angle bars back on the floor, aligning the holes in the bars with the holes in the floor. Insert the screws or bolts through the holes and tighten them using a screwdriver or a wrench. Make sure the bars are firmly attached to the floor and are level.
Step 6: Check for Alignment and Adjustment
Once the angle bars are attached, use a level to check if they are straight and level. If necessary, make adjustments by loosening the screws or bolts slightly and re - positioning the bars. Then, tighten the screws or bolts again to secure the bars in place.
Welding Option
If you have the skills and equipment, you can also weld the L Type Angle Bars to the floor. Welding provides a stronger and more permanent connection. However, it requires more expertise and safety precautions. If you're interested in the welding option, you can check out our Welding Angle Bar products.
Tips and Tricks
- Pre - drill Pilot Holes: When drilling holes in the angle bars or the floor, it's a good idea to pre - drill pilot holes. This will prevent the material from cracking or splitting and make it easier to insert the screws or bolts.
- Use a Template: If you're installing multiple angle bars, you can create a template to ensure that the holes are drilled in the same position on each bar. This will save you time and ensure a consistent installation.
- Work in Sections: If you're installing angle bars over a large area, it's best to work in sections. This will make the installation process more manageable and help you maintain accuracy.
Conclusion
Installing L Type Angle Bars on a floor is a relatively straightforward process that can add both functionality and style to your space. By following the steps outlined in this guide and using the right tools and materials, you can get the job done quickly and easily. Whether you choose to use screws, bolts, or welding, make sure to take the necessary safety precautions and double - check your work for accuracy.
If you're interested in purchasing L Type Angle Bars for your project, we're here to help. We offer a wide range of high - quality angle bars at competitive prices. Contact us today to discuss your requirements and get a quote. We're always happy to assist you with your procurement needs.
References
- General knowledge about construction and installation of metal bars.
- Product information from our L Type Angle Bar inventory.