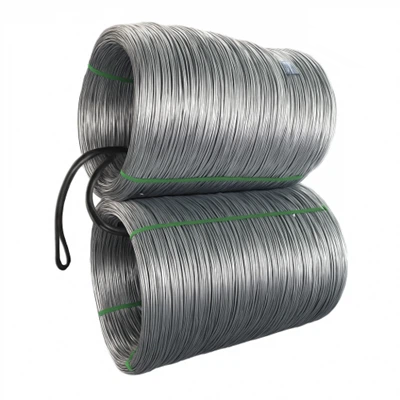
When it comes to constructing sturdy and reliable structures, welding angle bars in a corner joint is a fundamental skill. As a trusted Welding Angle Bar Welding Angle Bar supplier, I've witnessed firsthand the importance of proper welding techniques in ensuring the integrity and durability of various projects. In this blog post, I'll share a comprehensive guide on how to weld angle bar in a corner joint, covering everything from preparation to the finishing touches.
Understanding the Basics of Angle Bars
Before diving into the welding process, it's essential to have a clear understanding of what angle bars are and their applications. Angle bars, also known as angle irons, are L-shaped structural steel components commonly used in construction, manufacturing, and DIY projects. They come in various sizes, thicknesses, and materials, including Standard Angle Bar and Steel Solid Angle Bar, each designed to meet specific requirements.
Angle bars are versatile and can be used for a wide range of applications, such as framing, bracing, supports, and decorative elements. When welding angle bars in a corner joint, the goal is to create a strong and secure connection that can withstand the forces and stresses applied to the structure.


Preparing for Welding
Proper preparation is key to achieving a successful weld. Here are the steps you need to take before you start welding:
1. Gather the Necessary Tools and Materials
- Welding Machine: Choose a welding machine that is suitable for the type of welding you'll be doing. For angle bar welding, a MIG (Metal Inert Gas) or TIG (Tungsten Inert Gas) welder is commonly used.
- Welding Helmet: Protect your eyes and face from the intense light and sparks generated during welding with a high-quality welding helmet.
- Welding Gloves: Invest in a pair of heat-resistant welding gloves to protect your hands from burns and injuries.
- Angle Grinder: Use an angle grinder to clean and prepare the surfaces of the angle bars for welding.
- Clamps: Secure the angle bars in place using clamps to ensure proper alignment and prevent movement during welding.
- Safety Glasses: Wear safety glasses to protect your eyes from flying debris and sparks.
- Chipping Hammer and Wire Brush: Use a chipping hammer and wire brush to remove any slag or impurities from the weld bead after welding.
2. Clean the Angle Bars
Before welding, it's crucial to clean the surfaces of the angle bars to remove any dirt, rust, paint, or other contaminants. Use an angle grinder with a wire brush wheel to clean the edges and surfaces of the angle bars until they are shiny and free of debris. This will ensure good electrical conductivity and a strong weld.
3. Prepare the Welding Area
Choose a well-ventilated area for welding to prevent the accumulation of harmful fumes and gases. Make sure the area is free of flammable materials and that you have a fire extinguisher nearby in case of an emergency. Set up your welding machine and adjust the settings according to the thickness and type of angle bars you'll be welding.
4. Position the Angle Bars
Position the angle bars in the desired corner joint configuration and use clamps to secure them in place. Make sure the angle bars are aligned properly and that the joint is tight. You can use a square or a level to ensure accurate alignment.
Welding Techniques for Angle Bar Corner Joints
There are several welding techniques that can be used to weld angle bars in a corner joint, including MIG welding, TIG welding, and stick welding. Each technique has its own advantages and disadvantages, and the choice of technique will depend on the specific requirements of your project.
1. MIG Welding
MIG welding is a popular choice for welding angle bars in a corner joint because it is fast, efficient, and produces high-quality welds. Here's how to weld angle bars using MIG welding:
- Set up the MIG welder: Adjust the settings on the MIG welder according to the thickness and type of angle bars you'll be welding. Refer to the manufacturer's instructions for the recommended settings.
- Prepare the welding wire: Choose a welding wire that is compatible with the type of angle bars you'll be welding. Cut the welding wire to the appropriate length and insert it into the MIG gun.
- Position the MIG gun: Hold the MIG gun at a 90-degree angle to the joint and about 1/8 inch away from the surface of the angle bars.
- Start welding: Pull the trigger on the MIG gun to start the welding process. Move the MIG gun in a steady, straight line along the joint, maintaining a consistent speed and distance from the surface of the angle bars.
- Fill the joint: As you weld, the welding wire will melt and fill the joint, creating a strong bond between the angle bars. Make sure to fill the joint completely and avoid leaving any gaps or voids.
- Finish the weld: Once you have completed the weld, release the trigger on the MIG gun and allow the weld to cool. Use a chipping hammer and wire brush to remove any slag or impurities from the weld bead.
2. TIG Welding
TIG welding is a more precise and controlled welding technique that is often used for welding thin or delicate materials. Here's how to weld angle bars using TIG welding:
- Set up the TIG welder: Adjust the settings on the TIG welder according to the thickness and type of angle bars you'll be welding. Refer to the manufacturer's instructions for the recommended settings.
- Prepare the tungsten electrode: Grind the tungsten electrode to a sharp point and insert it into the TIG torch.
- Position the TIG torch: Hold the TIG torch at a 90-degree angle to the joint and about 1/8 inch away from the surface of the angle bars.
- Start the arc: Press the foot pedal or trigger on the TIG torch to start the arc. The arc will heat the surface of the angle bars and melt the filler metal, creating a weld pool.
- Add filler metal: Use a filler rod to add filler metal to the weld pool. Move the filler rod in and out of the weld pool, adding small amounts of filler metal at a time.
- Move the TIG torch: As you add filler metal, move the TIG torch in a steady, circular motion along the joint, maintaining a consistent speed and distance from the surface of the angle bars.
- Finish the weld: Once you have completed the weld, release the foot pedal or trigger on the TIG torch and allow the weld to cool. Use a chipping hammer and wire brush to remove any slag or impurities from the weld bead.
3. Stick Welding
Stick welding, also known as shielded metal arc welding (SMAW), is a simple and versatile welding technique that is commonly used for welding thick or heavy materials. Here's how to weld angle bars using stick welding:
- Set up the stick welder: Adjust the settings on the stick welder according to the thickness and type of angle bars you'll be welding. Refer to the manufacturer's instructions for the recommended settings.
- Prepare the welding electrode: Choose a welding electrode that is compatible with the type of angle bars you'll be welding. Remove the coating from the end of the electrode and insert it into the electrode holder.
- Position the electrode holder: Hold the electrode holder at a 45-degree angle to the joint and about 1/8 inch away from the surface of the angle bars.
- Start the arc: Strike the electrode against the surface of the angle bars to start the arc. The arc will heat the surface of the angle bars and melt the electrode, creating a weld pool.
- Move the electrode holder: As you weld, move the electrode holder in a steady, zigzag motion along the joint, maintaining a consistent speed and distance from the surface of the angle bars.
- Fill the joint: As you move the electrode holder, the electrode will melt and fill the joint, creating a strong bond between the angle bars. Make sure to fill the joint completely and avoid leaving any gaps or voids.
- Finish the weld: Once you have completed the weld, release the electrode holder and allow the weld to cool. Use a chipping hammer and wire brush to remove any slag or impurities from the weld bead.
Post-Welding Inspection and Finishing
After welding the angle bars in a corner joint, it's important to inspect the weld for any defects or imperfections. Here are the steps you need to take to inspect and finish the weld:
1. Visual Inspection
- Check the weld bead: Look for any cracks, porosity, or other defects in the weld bead. The weld bead should be smooth, uniform, and free of any irregularities.
- Check the joint: Make sure the joint is strong and secure, and that there are no gaps or voids between the angle bars.
- Check the alignment: Use a square or a level to check the alignment of the angle bars. The angle bars should be perpendicular to each other and the joint should be straight.
2. Clean the Weld
- Remove the slag: Use a chipping hammer and wire brush to remove any slag or impurities from the weld bead. This will improve the appearance of the weld and prevent corrosion.
- Grind the weld: Use an angle grinder to grind the weld bead to a smooth finish. This will remove any rough edges or bumps and make the weld look more professional.
3. Apply a Protective Coating
- Paint the weld: Apply a coat of paint or other protective coating to the weld to prevent corrosion and improve its appearance. Choose a coating that is compatible with the type of angle bars and the environment in which they will be used.
Conclusion
Welding angle bars in a corner joint is a fundamental skill that is essential for constructing sturdy and reliable structures. By following the steps outlined in this blog post, you can ensure that your welds are strong, secure, and of high quality. Remember to always wear the appropriate safety gear, follow the manufacturer's instructions for your welding equipment, and take the time to prepare the angle bars and the welding area properly.
If you're in the market for high-quality Welding Angle Bar, Standard Angle Bar, or Steel Solid Angle Bar, look no further. Our company is a leading supplier of welding angle bars, offering a wide range of sizes, thicknesses, and materials to meet your specific needs. Contact us today to discuss your requirements and start a procurement negotiation. We look forward to working with you!
References
- American Welding Society. (2023). Welding Handbook, Volume 1: Welding Technology.
- Miller Electric Mfg. Co. (2023). Welding 101: A Beginner's Guide to Welding.
- Lincoln Electric. (2023). Welding Processes and Equipment.